Connecting to the gateway
You configure and manage the SenArch ARCH-1 Standard LoRaWAN Gateway through the Gateway UI, a web interface served by the gateway. This guide covers how the gateway gets online, how to open the Gateway UI, and how to sign in. Command-line access over SSH is also available for advanced use.
How the gateway gets online
The gateway connects over either WiFi or LTE and powers down the unused radio to save energy. By default it uses the LTE-preferred with initial WiFi profile (Settings → Backhaul → Profile), which behaves as follows:
- At startup, the gateway turns WiFi on and looks for a known network (it usually appears on your hotspot within about two minutes). If it finds one — such as your setup hotspot — it connects and stays on WiFi. This is how you do the initial local configuration.
- It switches to LTE when the WiFi network disappears (for example, when you turn off your hotspot), or when you select Force LTE in the Gateway UI. Once on LTE, the WiFi interface is turned off.
- If the LTE connection drops, the gateway turns WiFi back on to look for a hotspot while it works to restore LTE. If a hotspot is available, it uses WiFi in the meantime; when LTE comes back, it returns to LTE.
- If neither WiFi nor LTE is available, the gateway recovers on its own — escalating from a modem soft reset, to a hard reset, and finally a full gateway reboot if the outage continues.
LTE must be provisioned first
LTE only works once the SIM card is installed and the APN is set. Force LTE — and the automatic switch to LTE — has no effect until LTE is provisioned. See LTE provisioning.
No local WiFi access while on LTE
While the gateway is on LTE, its WiFi interface is off, so local access over WiFi is not available. Reach the gateway remotely through the VPN tunnel instead (see Set up remote access).
For a gateway that should never use cellular, choose the WIFI-only profile — it keeps the modem off and stays on WiFi.
Connect over WiFi
For the first configuration, create a WiFi hotspot on your phone or laptop with these parameters:
| Parameter | Value |
|---|---|
| SSID | senarch |
| Password | senarch123 |
| Frequency | 2.4 GHz |
| Protocol | 802.11 b/g/n (WiFi 5 is not supported) |
Connect your computer to this hotspot, then power on the gateway by connecting its battery. The gateway joins the hotspot within about two minutes.
This isn't the admin password
senarch123 is the default WiFi password the gateway looks for — it is not the Gateway UI admin
password, nor the root password. See Sign in to the Gateway UI below.
Open the Gateway UI
- Find the gateway on your network. It appears in your router or hotspot client list as
archXXXX, whereXXXXis its four-digit serial number. Note its IP address. - In a browser, go to
http://<gateway-ip>(for examplehttp://192.168.1.50). The Gateway UI is served on the standard web port, so no port number is needed.
Sign in to the Gateway UI
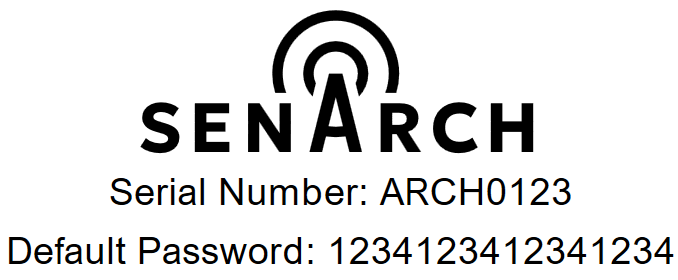
The Gateway Login page asks for the admin password. Each gateway has a unique password, printed on the gateway label and also available from SenArch. It is not a shared default.
The label shows the serial number and the default password:
After you sign in, the Dashboard opens. The Gateway UI has five areas:
- Dashboard — health and status, software and hardware versions, and the CoHost details.
- Settings — WiFi, LTE, LoRaWAN, and VPN configuration.
- Location — GPS position and manual coordinates.
- Account — change the admin password and set the session timeout.
- Docs — opens this documentation.
Identify a gateway
If you have several gateways powered on, select Gateway Blink in the header to make this gateway's light blink, so you can tell which physical unit you are connected to.
Change or add a WiFi network
After the initial setup, point the gateway at any 2.4 GHz network at your site:
- In the Gateway UI, open Settings → Backhaul → WiFi.
- Edit the existing entry, or select Add to configure an additional network (SSID and password).
- Select Save Changes.
The network must be 2.4 GHz and support 802.11 b/g/n. WiFi 5 is not supported.
Changing WiFi in WIFI-only mode
In the WIFI-only profile the gateway must always keep at least one WiFi network, so you cannot
delete the last credential and save. To replace it, add the new network first, then delete the
old one.
SSH access
Most tasks use the Gateway UI. If you prefer the command line, you can also reach the gateway over SSH — it uses the same admin password as the Gateway UI.
- Find the gateway's IP address (see Open the Gateway UI).
- Open a terminal and connect:
- Enter the gateway's unique admin password when prompted.
Success: if you reach the gateway shell, SSH is working. Type exit to close the session.
Discover the available commands
Once connected, run senarch-help to list the gateway's helper commands — the same commands the
Gateway UI uses behind the scenes.
Access over LTE
Once LTE provisioning and remote access are set up, you can reach the gateway remotely when it is on LTE. Both your computer and the gateway connect to the same VPN, and you then open the Gateway UI (or SSH) using the gateway's VPN IP address. See Set up remote access for the full procedure.
Next steps
- Review gateway security — change the admin password and other settings
- Set up remote access for secure management over LTE
- Provision LoRaWAN to connect to your network server